Here is a phone camera shot of him right before getting married last year. And, yes, that really is his hair. ;-) Not.

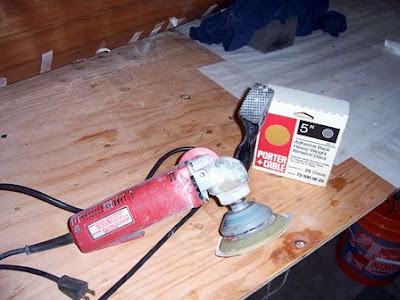
Al started by using his orbital sander to smooth out the entire inside of the kayak. I had had plenty of trouble getting the fiberglass to lay down when I did the interior, but he was able to sand out the bumps and make it fairly presentable. Then we vacuumed out the epoxy dust, wiped it down and applied a very thin top dressing of epoxy. (I was amazed at how little epoxy you really needed. We only used 6 oz. for the entire interior top coat.)
As soon as we laid the deck on top of the hull we realized the edges weren't going to be easy to match up. There were some areas where the deck overlapped the hull by as much as 1/2" and other areas where it was too narrow and it slipped inside the hull. Al asked me what kind of tape I had and I showed him four rolls of the "best strapping tape money could buy". :-) Well, at least two of them were, the other two rolls (from a different manufacturer) were cheap and kept breaking.
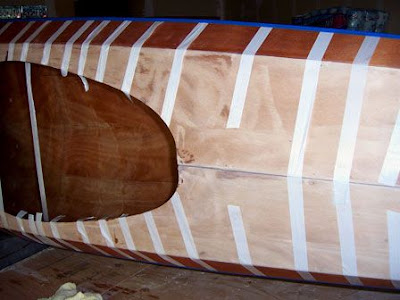
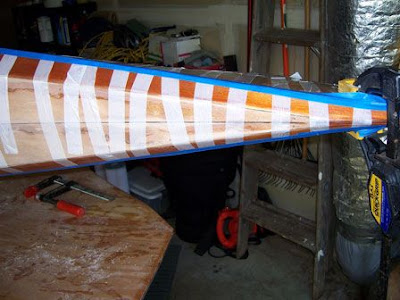
These two rolls of strapping tape and our brute strength proved enough to push, squeeze, and pull the hull and deck together (lining up the sheer edges perfectly) and then hold them in place with the tape until they could be glued together. Here's a shot of the bow strapping work.
Allan read through the kayak manual and then recommended we change things a bit. The manual only directed to use a syringe filled with epoxy to glue the interior deck/hull seam, but Al said we should use epoxy AND fiberglass. I showed him the roll of 2" wide fiberglass seaming cloth I had and he said that would be perfect. We put blue painter's tape on the outer seam and then turned the kayak on it's side so the glue/fiberglass wouldn't run out of the seam while it dried.
He created an impromptu gluing trough with extra cardboard I had around and used that to wet both sides of the fiberglass strips. I cut the handle off an old leaf rake and Al taped a paint brush at the end. He would only cut the strips about as long as the handle.

He would first coat the interior deck/hull seam with epoxy, then position the wetted strip length-wise down the handle from the brush on down. Next he would reach into the kayak (keeping the strip on the upside of the handle) until he got it all the way to the bow of the kayak. Then he would turn the handle/brush over and gravity would slowly peel the strip off the handle and drop it into the seam. It was brilliant!

Here is a shot of the interior seam with some strapping tape running through the inside to pull the deck narrow enough to match the hull edge. (We cut and removed the tape later - and then laid down another small strip of fiberglass to fill the gap.)
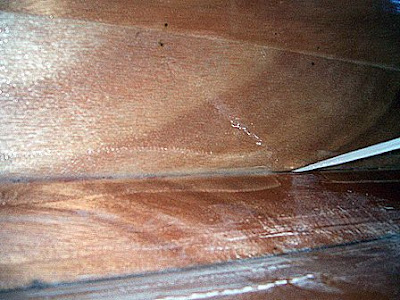
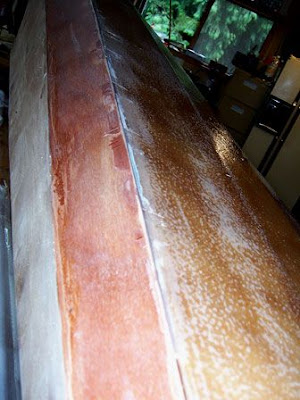
(Below) Looking back toward the stern. The seam is at the bottom of the photo. On the left you see the underside of the deck is looking a bit white . . . I had sanded this but didn't get a chance to top coat it with epoxy before Allan came over. I'll have to do this later. (The little white squares are the remenant stickers telling me which piece is what.)

Allan was very good at this (my attempt to place the strip in the stern didn't go well. I dropped the strip completely off the seam . . . Al had to fix it) so I worked a flood light inside the boat and he continued placing strips on the seam. We let the starboard seam dry overnight and then the next morning Al came over again to help me with the port seam.
Once this was laid in place we started peeling off the strapping tape from the (now dry) seams. It looked great! And wow, the interior deck seam was really going to be strong now! Thank you Allan!!
No comments:
Post a Comment