Experience the entire journey by clicking on this link: http://boat-building.blogspot.com/2008/03/1-starting-building-process.html
Otherwise you'll only see the finished product here and miss all the fun. Enjoy!
The patient wooden boat-builder:
~Todd Rawlings
Monday, November 10, 2008
Wednesday, July 23, 2008
11. Final Sanding, finish coat and LAUNCH!
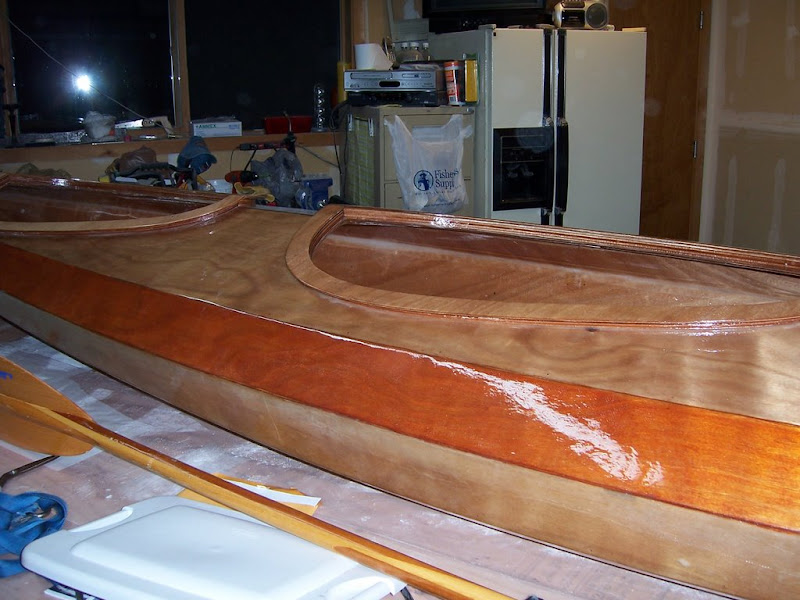
7/19/2008: One day before launch. I knew I was going to need to sand the hull again because I just had too many drips, blemishes and uneven surface left. I wanted it as close to perfect as I could . . . even though I knew I was launching it the next day.
The combings had dried completely, so I took off all the C-Clamps. A couple of the ones (without plastic tips) had gotten some epoxy on them and slightly hardened to the underside of the deck. I'll have to remember to place some plastic between them next time . . . but we were so focused on getting the clamps in place, we hadn't worried about it last night. I was able to wiggle most of them free without damage, but one C-Clamp brought a piece of the deck underside with it. (Dang it all.) I guess I'll need to fill it with some epoxy and sand it smooth.
Besides that issue, I'm happy with the results. I turn over the boat and completely sand the hull. I apply a light coat of epoxy as the top coat (knowing I'll be finishing it with polyurethane later - but epoxy will be good enough for the "birthday" launch.) I let that dry overnight.
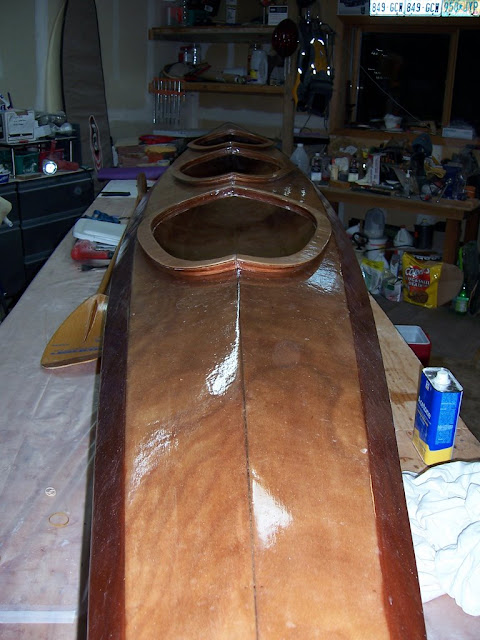
Sunday, 7/20/2008: Launch day. I'm cutting it incredibly close, I know, but I have to go for it! I wake up at 6:30 a.m. knowing that we're launching at 2:00 p.m. I start the final deck sanding by hand (because the rest of the family is sleeping) but soon realize its going too slow. I bring a fan into the house and get that going to help drowned out the noise. I start rotary sanding at about 7:00 a.m. Sanding is done by about 8:00. Six hours to launch.
I decide to take my chances and finish the deck with a very light coat of epoxy. Mid-way through I realize that I bought the "slow hardener" that says it typically takes 8-hours to dry. I'm starting to get nervous . . . I know that a "sticky" deck would ruin the launch. I'm committed now though, so I finish applying the epoxy.
10:00 a.m. My son, Josh, helps me move the kayak out into sun and I also put a fan on it. I'm hoping the extra heat and air will speed up drying.
11:30 a.m.: I touch the deck near the bow and it's still a little tacky. I go work on getting the kayak rack ready on the car.
12:30 p.m.: I touch one of the combings and its dry. Praise be! I touch the deck and it too is dry. My spirits raise considerably.
1:30 p.m.: Josh helps me load the kayaks onto the car and we start driving to Rattlesnake Lake near North Bend, WA. We're meeting our friends there for the big launch and to celebrate my wife's birthday. The campagne is chilling!
2:30 p.m.: I took extra care to tie the kayak down on the new Yakima rack (alleviating visions of the finished kayak flying off the car on I-90 and ending up in pieces on the freeway --- yes, its happened to me before, luckily just an old bed, but definitely another lesson learned :-P )
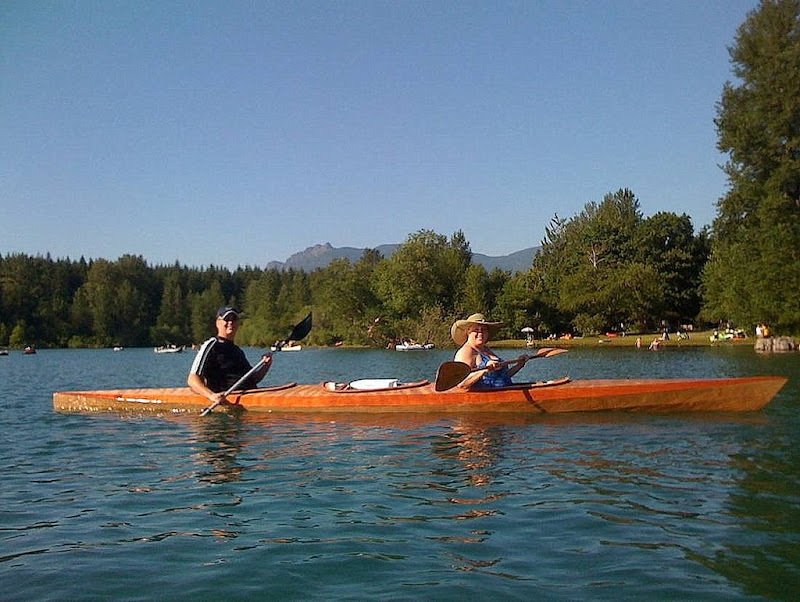
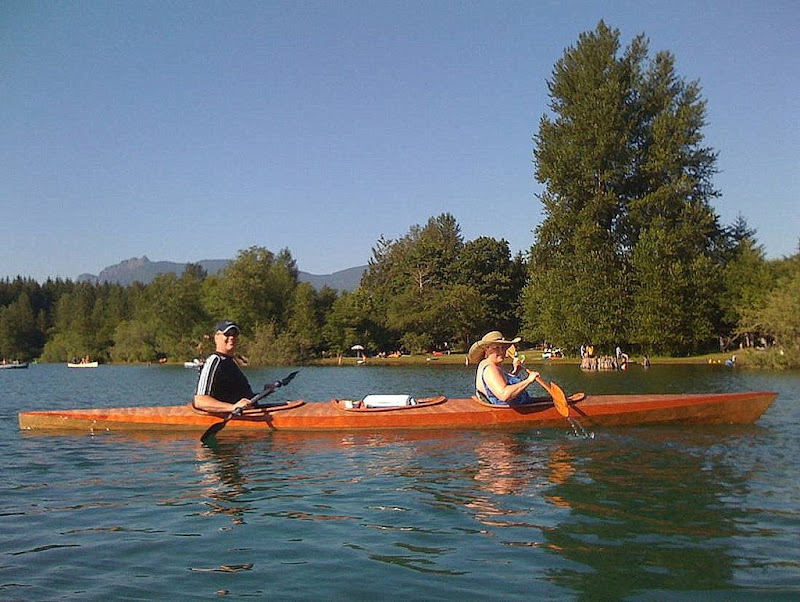
We make it to Rattlesnake Lake safely, launch the boat and have a wonderful, relaxing time. The kayak glides like it's on ice! We easily out pace the other two kayaks and even help some friends by towing them across the lake.
I'm so happy!!
Here are some photos from the launch day and the finished kayak:
Thank you to EVERYONE who helped me accomplish this DREAM!!
Tuesday, July 22, 2008
10. More C-Clamps than I ever thought possible
7/18/2008: Three days before launch. My wife's girlfriends were taking her out for an early birthday dinner and that was a perfect time for the guys to work on the kayak (and have a pizza night). I picked up our favorite supreme 'zaaa from Flying Pie. I ordered a medium, but it's so thick that Allan and I could only eat two pieces (half of it) ourselves. Oh well, left-overs are great too!
Tonight was the night to attach the combings to the deck around each seat opening. (The combings serve two main purposes: 1 - to attach your spray skirt bungie's around and keep water from entering your kayak when you're paddling on a rough lake or in ocean swells; 2 - they add strength to the area around where you sit, rest your arms, and push on to get into and out of the kayak.)
Since Allan has so much previous kayak building experience, I took his advice to heart when it had to do with ways to improve on the Pygmy instructions. He had suggested I fiberglass both sides of all the combing pieces to make them even stronger. I had done this ahead of time and then sanded the combings (prepping them for attachment to the deck).
Allan finshed them by setting the combings on the deck, marking where they needed to be cut and then using my Japanese saw to size them correctly. We sanded the deck around each hole. We applied masking tape about 2" out from edge (to help reduce drips). Next we applied epoxy to the underside of the combing, a strip of the fiberglass tape, wetted that glass, turned it over and positioned it on the deck, and then clamped it down lightly with C-Clamps.
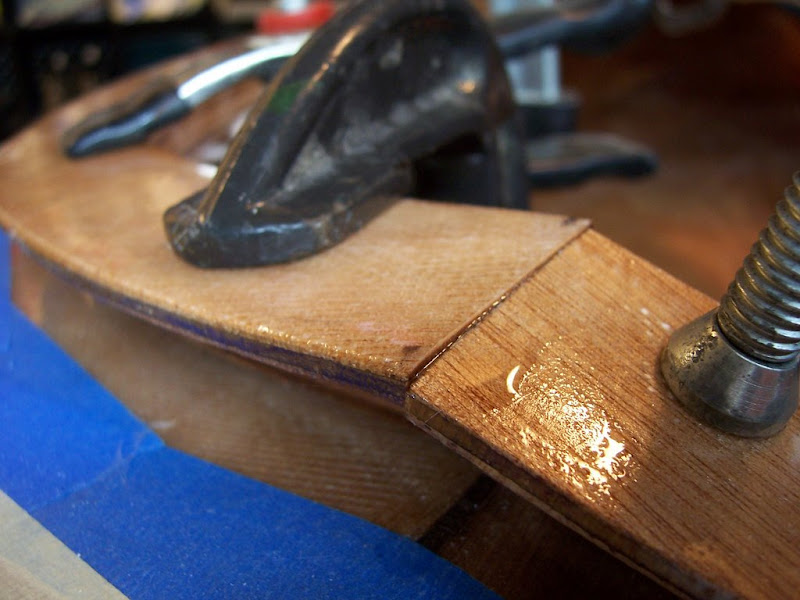
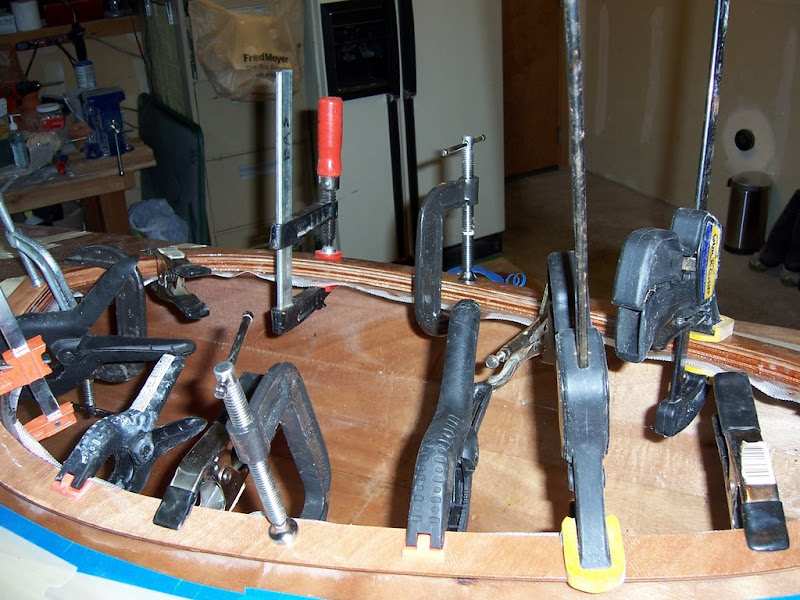
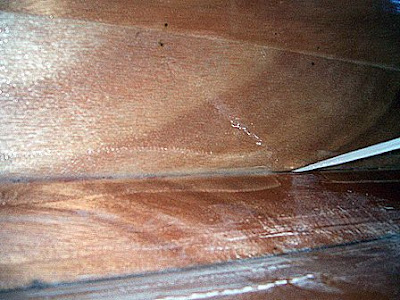
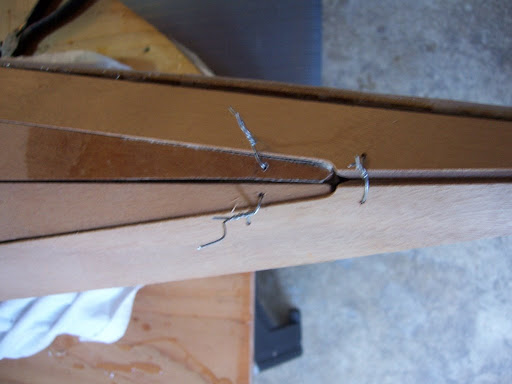
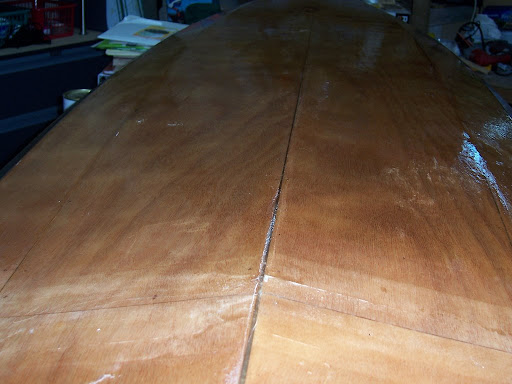
Once they were in place, Allan helped adjust them so the seams matched as closely as possibly and all the edges were also matching the deck opening. This was a bit of an art - as clamping down had a tendency to cause things to shift a bit, so we loosened and retightened the clamps several times on the first combing . . . less on the second and third. Here's a close-up of one of the seams. (It's pretty close but will need some sanding for perfection.)
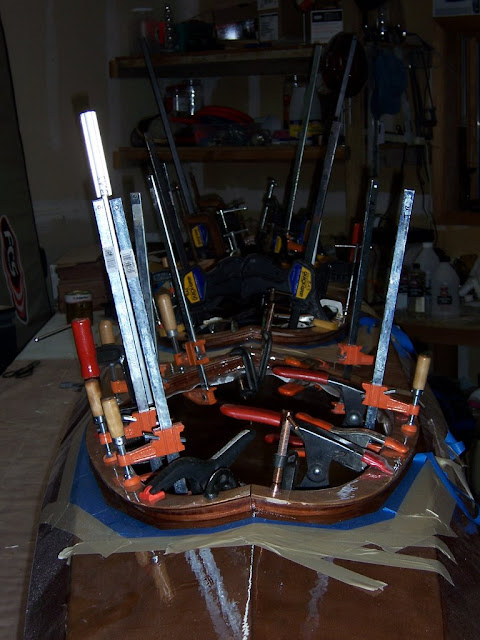
We wanted to make sure the combings fully bonded with all the deck surface around the hole, so 5-6 clamps per side were needed. I quickly used up all of the C-Clamps I had from my buddies (Brent S. and Allan) and had to run across the street to my neighbor (Adrian S.) to borrow all of his clamps. Luckily I had also purchased five new ones the evening before at Home Depot (I think I'm one of their best customers lately . . . don't ever ask a boat builder how much it actually cost to build it.) ;-)
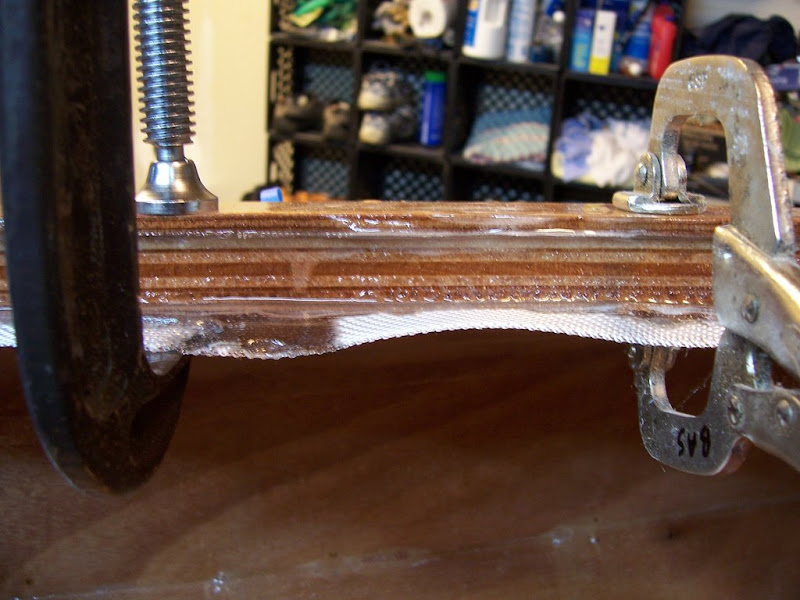
A look at the combing clamped down from inside.

I let everything dry overnight before attempting to start my finish sanding.
Tonight was the night to attach the combings to the deck around each seat opening. (The combings serve two main purposes: 1 - to attach your spray skirt bungie's around and keep water from entering your kayak when you're paddling on a rough lake or in ocean swells; 2 - they add strength to the area around where you sit, rest your arms, and push on to get into and out of the kayak.)
Since Allan has so much previous kayak building experience, I took his advice to heart when it had to do with ways to improve on the Pygmy instructions. He had suggested I fiberglass both sides of all the combing pieces to make them even stronger. I had done this ahead of time and then sanded the combings (prepping them for attachment to the deck).
Allan finshed them by setting the combings on the deck, marking where they needed to be cut and then using my Japanese saw to size them correctly. We sanded the deck around each hole. We applied masking tape about 2" out from edge (to help reduce drips). Next we applied epoxy to the underside of the combing, a strip of the fiberglass tape, wetted that glass, turned it over and positioned it on the deck, and then clamped it down lightly with C-Clamps.
Once they were in place, Allan helped adjust them so the seams matched as closely as possibly and all the edges were also matching the deck opening. This was a bit of an art - as clamping down had a tendency to cause things to shift a bit, so we loosened and retightened the clamps several times on the first combing . . . less on the second and third. Here's a close-up of one of the seams. (It's pretty close but will need some sanding for perfection.)
We wanted to make sure the combings fully bonded with all the deck surface around the hole, so 5-6 clamps per side were needed. I quickly used up all of the C-Clamps I had from my buddies (Brent S. and Allan) and had to run across the street to my neighbor (Adrian S.) to borrow all of his clamps. Luckily I had also purchased five new ones the evening before at Home Depot (I think I'm one of their best customers lately . . . don't ever ask a boat builder how much it actually cost to build it.) ;-)
A look at the combing clamped down from inside.
Once we had everything clamped down I took several photos - it just looked so interesting with all the different shapes and sizes of C-Clamps.
I let everything dry overnight before attempting to start my finish sanding.
9. One week to launch - still not satisfied with the look.
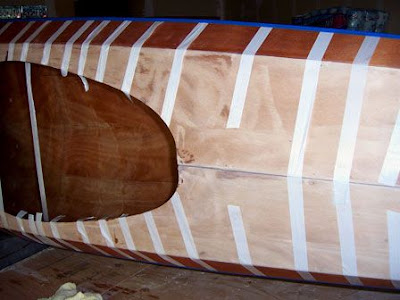
7/14/2008: Now that the deck was securely fastened (from the inside) to the hull, it was time to glass the outside. I was immediately presented with a problem though because I had used up all the fiberglass cloth that Pygmy had sent me when I redid the section of hull that hadn't cured.

I was basically out of cloth.
No problem, I thought, I'll just leave work early one day this week, stop by my trusty boat supply store (Fisheries Supply) and pick up some more fiberglass. Cloth is cloth right?
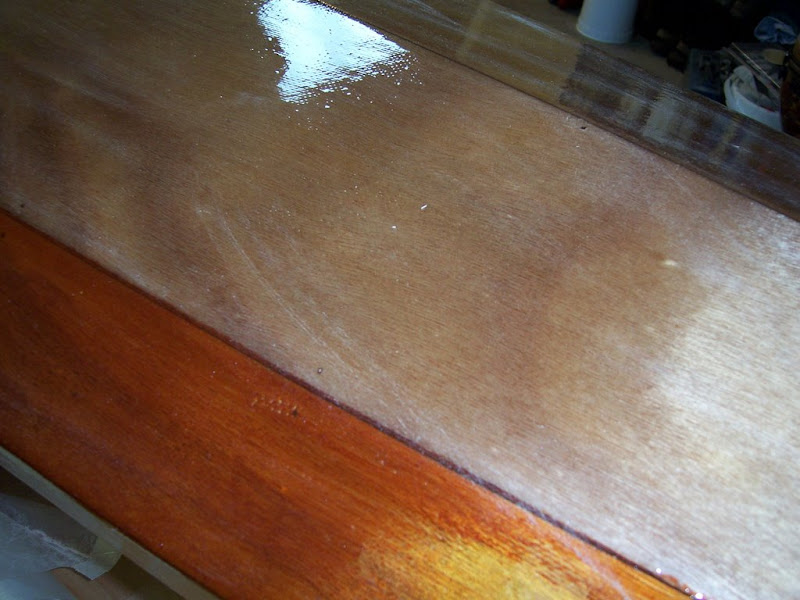
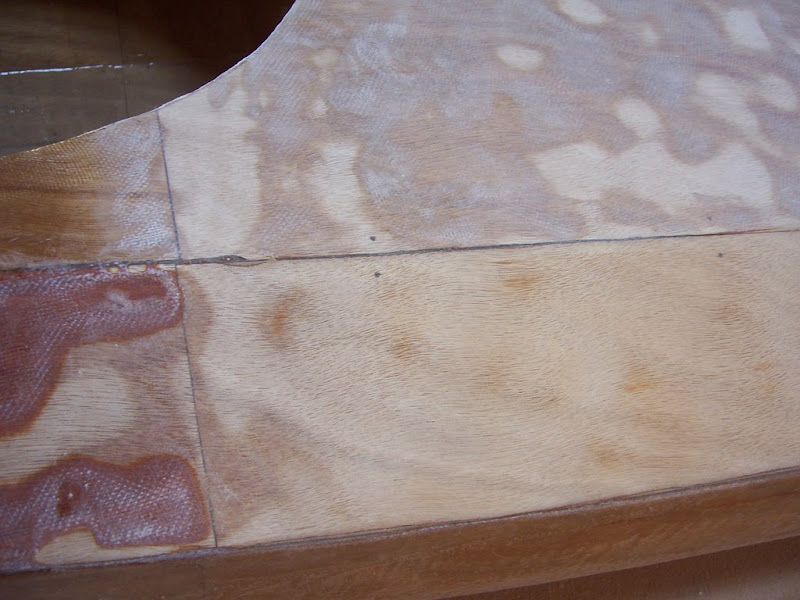
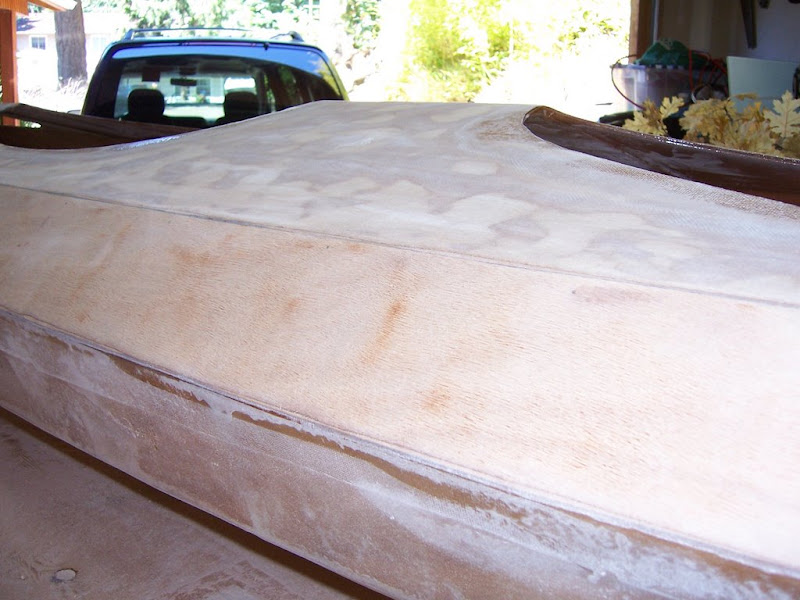
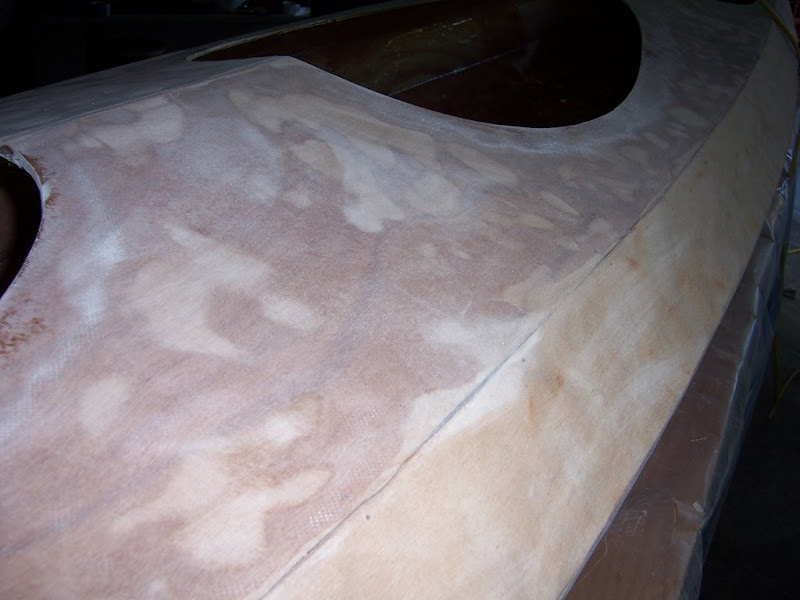
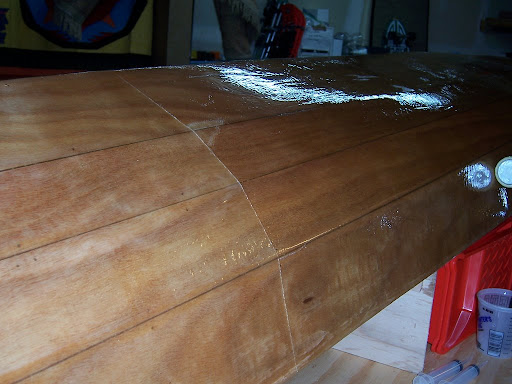
Isn't it amazing how many lessons we learn when we're working on projects like this? Well, you guessed it, the fiberglass cloth they sold at F.S. was not the same as Pygmy; it didn't turn completely clear when you wet it with the epoxy. You can kind of see it in this photo - the transition from clear to visable white-ish weave.
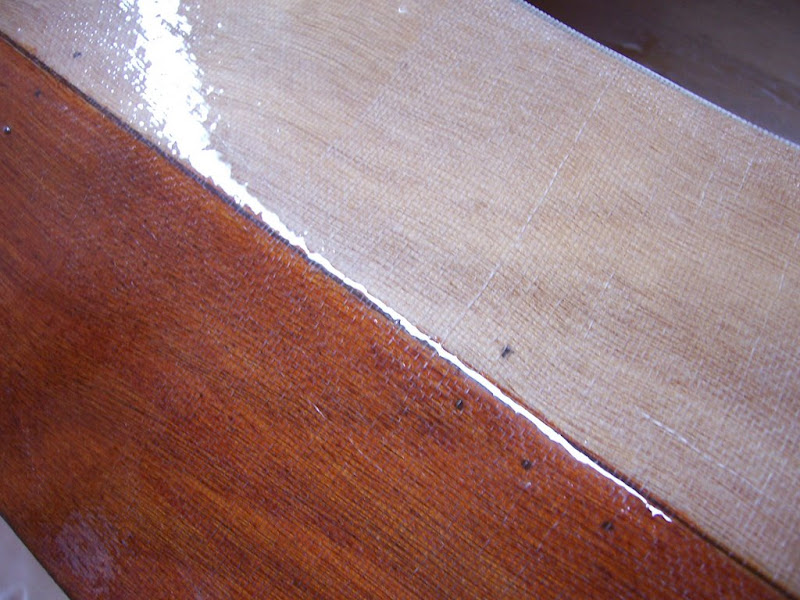
You can see it a little better in this close-up. The weave is obviously not turning clear.
Allan was still helping me with the boat, so I showed him the difference between the two areas on the deck. He thought it might turn more clear if I applied another coat of epoxy - or he said I might try adding a pigment to the epoxy to cover it up. I just loved the natural wood color though and I wasn't willing to settle for covering it up.
First, I had to make sure I could get more cloth from Pygmy in time. I checked on their website and sure enough they sold it. It turns out they buy some special figerglass cloth and supervise the production runs to ensure it is the highest quality (they make sure it will turn clear). I order it and then call them to make sure I can get it shipped quickly. The support person I talked to said they can ship it UPS ground and I'll get it next day. PERFECT. They saved me.
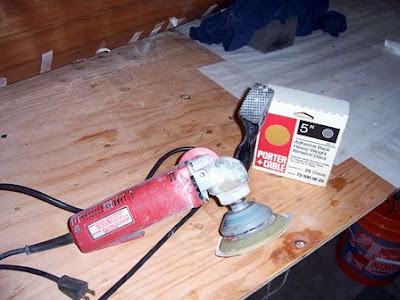
Then I made my next decision. Let's do this right - so, over the next two evenings (5 hours total) I used the rotary sander and sanded off the layers of epoxy and the bad fiberglass . . . all the way down to the wood!!
There were only 4 days left until my planned launch (my wife's birthday - 7/20) and I was redoing the fiberglass on the deck?
Yes, at this point I knew I was crazy - maybe it was all the fiberglass and epoxy dust? (Actually I was extremely careful throughout this sanding process - always using a high-quality 3M mask and googles.) Fiberglass does make you itch though and I had to be sure and vacuum myself off and then thoroughly wash off in the shower. Nonetheless, I was sure it was going to be worth it.
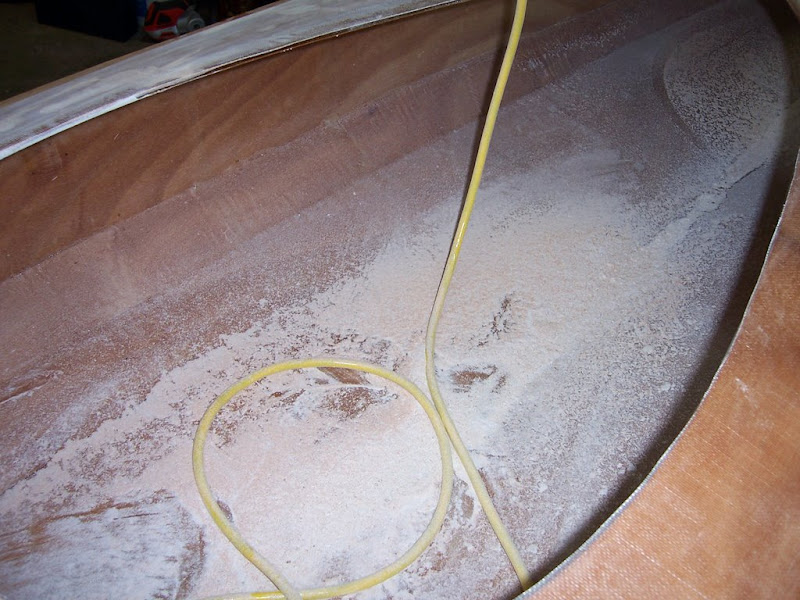
Sanding like this produces a boatload of dust . . . pun intended. ;-) And I ended up burning out my vacuum and having to go purchase a more robust shop vac. That turned out to be a real godsend (and also helped alleviate some of the complaints I was getting from my wife, "You're tracking that white dust everywhere!")
I finally got all the bad fiberglass off - while being careful NOT to sand away too much of my wood. (The plywood is only 4mm thick - so I had to really pay attention.)
The Pygmy fiberglass cloth arrived as planned and I quickly redid that 3/4 of the boat. I let that dry overnight and then Allan was coming over the next evening to help me attach the combings.
Thursday, July 3, 2008
8. Attaching the Deck to the Hull . . . a.k.a. Strapping Tape Persuasion
One of my best friends, Allan, came over to my workshop last weekend and boy was I ever lucky he did. It turns out that early in his career he worked with a local Seattle-area, ex-Boeing engineer who had developed a process to vacuum mold kayaks. Al had all sorts of experience working with epoxy, fiberglass, and knowing how to "persuade" decks and hulls to match up so you could glue them.

Allan read through the kayak manual and then recommended we change things a bit. The manual only directed to use a syringe filled with epoxy to glue the interior deck/hull seam, but Al said we should use epoxy AND fiberglass. I showed him the roll of 2" wide fiberglass seaming cloth I had and he said that would be perfect. We put blue painter's tape on the outer seam and then turned the kayak on it's side so the glue/fiberglass wouldn't run out of the seam while it dried.


Here is a phone camera shot of him right before getting married last year. And, yes, that really is his hair. ;-) Not.
Al started by using his orbital sander to smooth out the entire inside of the kayak. I had had plenty of trouble getting the fiberglass to lay down when I did the interior, but he was able to sand out the bumps and make it fairly presentable. Then we vacuumed out the epoxy dust, wiped it down and applied a very thin top dressing of epoxy. (I was amazed at how little epoxy you really needed. We only used 6 oz. for the entire interior top coat.)
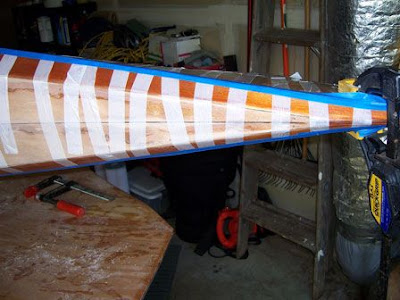
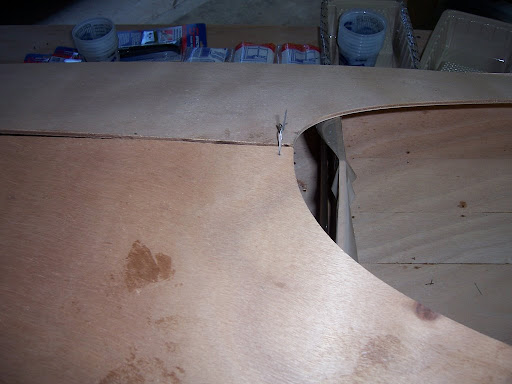
As soon as we laid the deck on top of the hull we realized the edges weren't going to be easy to match up. There were some areas where the deck overlapped the hull by as much as 1/2" and other areas where it was too narrow and it slipped inside the hull. Al asked me what kind of tape I had and I showed him four rolls of the "best strapping tape money could buy". :-) Well, at least two of them were, the other two rolls (from a different manufacturer) were cheap and kept breaking.
These two rolls of strapping tape and our brute strength proved enough to push, squeeze, and pull the hull and deck together (lining up the sheer edges perfectly) and then hold them in place with the tape until they could be glued together. Here's a shot of the bow strapping work.
Allan read through the kayak manual and then recommended we change things a bit. The manual only directed to use a syringe filled with epoxy to glue the interior deck/hull seam, but Al said we should use epoxy AND fiberglass. I showed him the roll of 2" wide fiberglass seaming cloth I had and he said that would be perfect. We put blue painter's tape on the outer seam and then turned the kayak on it's side so the glue/fiberglass wouldn't run out of the seam while it dried.
He created an impromptu gluing trough with extra cardboard I had around and used that to wet both sides of the fiberglass strips. I cut the handle off an old leaf rake and Al taped a paint brush at the end. He would only cut the strips about as long as the handle.
He would first coat the interior deck/hull seam with epoxy, then position the wetted strip length-wise down the handle from the brush on down. Next he would reach into the kayak (keeping the strip on the upside of the handle) until he got it all the way to the bow of the kayak. Then he would turn the handle/brush over and gravity would slowly peel the strip off the handle and drop it into the seam. It was brilliant!
Here is a shot of the interior seam with some strapping tape running through the inside to pull the deck narrow enough to match the hull edge. (We cut and removed the tape later - and then laid down another small strip of fiberglass to fill the gap.)
(Below) Looking back toward the stern. The seam is at the bottom of the photo. On the left you see the underside of the deck is looking a bit white . . . I had sanded this but didn't get a chance to top coat it with epoxy before Allan came over. I'll have to do this later. (The little white squares are the remenant stickers telling me which piece is what.)
Allan was very good at this (my attempt to place the strip in the stern didn't go well. I dropped the strip completely off the seam . . . Al had to fix it) so I worked a flood light inside the boat and he continued placing strips on the seam. We let the starboard seam dry overnight and then the next morning Al came over again to help me with the port seam.
Once this was laid in place we started peeling off the strapping tape from the (now dry) seams. It looked great! And wow, the interior deck seam was really going to be strong now! Thank you Allan!!
Wednesday, July 2, 2008
7. Stitching & Gluing the Deck
Now that the outside of the hull was finished I could start on the top of the boat (what they call the "deck"). It was comprised of four long pieces, each made up of three sections that I had glued together at their joints earlier (you can see the joints because they are the darker areas where I used epoxy and fiberglass).
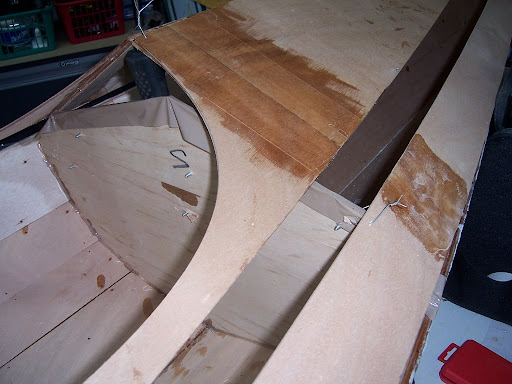
The first step was assembling and installing the forms (supports for the deck). They acted as guides so that I would glue the deck pieces together at the correct angles and also held it up until it was dry. I put plastic packing tape over the tops of the forms so I wouldn't accidentally glue my deck to them.
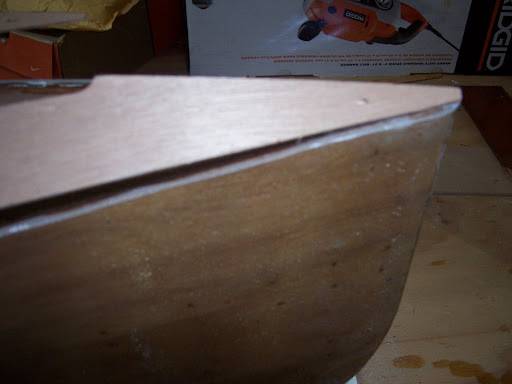
I matched the bow and stern tips as best I could.
I drilled the tiny holes and wired the pieces together (just like I had done earlier with the hull pieces.) It went faster this time and I didn't poke my fingers . . . well at least I didn't as often as I had before. ;-) The wood blocks helped elevate the deck while I was inserting wires.
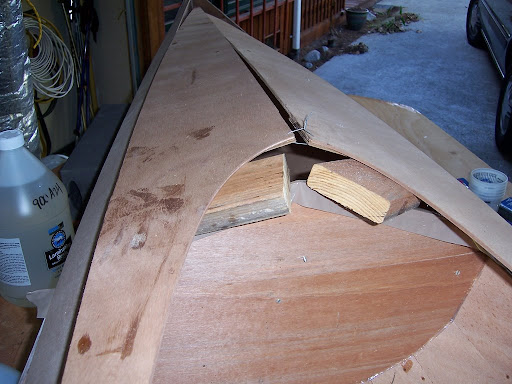
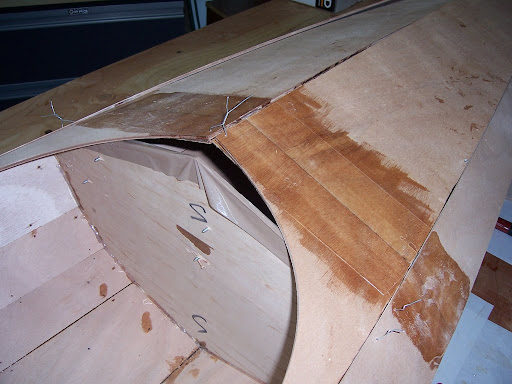
The bow tip was complicated because the holes were so close to the tip edges that I thought I was going to break them. (Actually, you see in this picture that I did break one of the tips when I was moving the piece around in my workshop - it is darker color because I had to glue it and put fiberglass on both sides to strengthen it.)
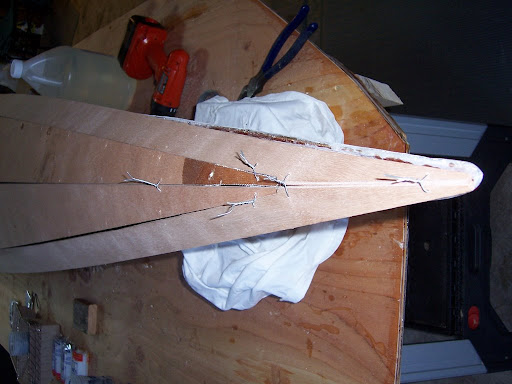
A close-up of the bow stitching job.
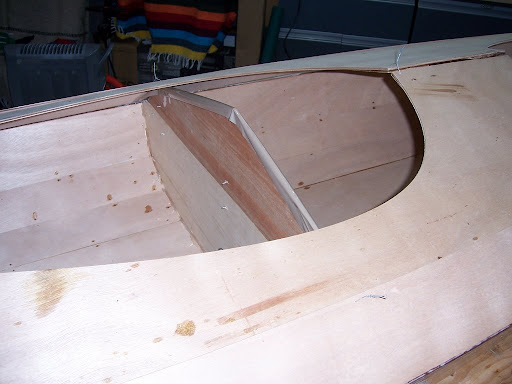
One thing I noticed is that you can't always trust the measurements given in the manual. You can see here how the support forms didn't line up correctly with the 3-person deck holes. I debated whether to move the forms (so they were directly under a seam area) but I had glued them into the inside of the hulls already. The deck seemed to be positioned correctly from an angle perspective, so I let them be.
Next I filled the syringe with epoxy and glued all the seams. I let that cure over night and then turned the deck over and fiberglassed the inside.
The first step was assembling and installing the forms (supports for the deck). They acted as guides so that I would glue the deck pieces together at the correct angles and also held it up until it was dry. I put plastic packing tape over the tops of the forms so I wouldn't accidentally glue my deck to them.
I matched the bow and stern tips as best I could.
I drilled the tiny holes and wired the pieces together (just like I had done earlier with the hull pieces.) It went faster this time and I didn't poke my fingers . . . well at least I didn't as often as I had before. ;-) The wood blocks helped elevate the deck while I was inserting wires.
The bow tip was complicated because the holes were so close to the tip edges that I thought I was going to break them. (Actually, you see in this picture that I did break one of the tips when I was moving the piece around in my workshop - it is darker color because I had to glue it and put fiberglass on both sides to strengthen it.)
A close-up of the bow stitching job.
One thing I noticed is that you can't always trust the measurements given in the manual. You can see here how the support forms didn't line up correctly with the 3-person deck holes. I debated whether to move the forms (so they were directly under a seam area) but I had glued them into the inside of the hulls already. The deck seemed to be positioned correctly from an angle perspective, so I let them be.
Next I filled the syringe with epoxy and glued all the seams. I let that cure over night and then turned the deck over and fiberglassed the inside.
6. Finishing the Hull - Round Two
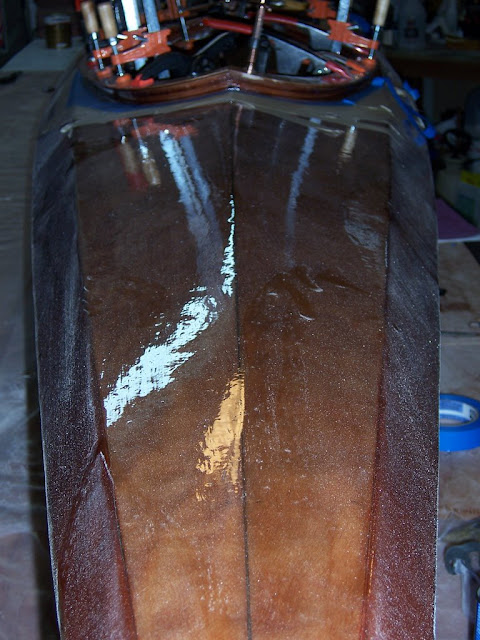
The hull where the bad epoxy had been was sanded clean now and it was time to try this again.
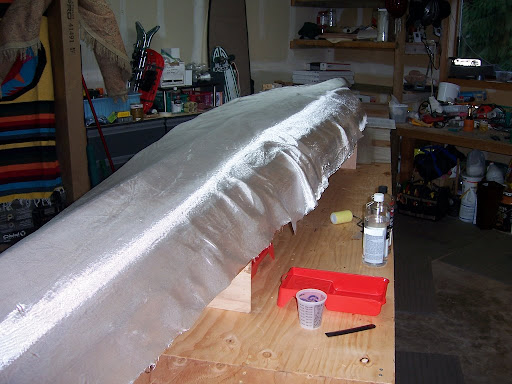
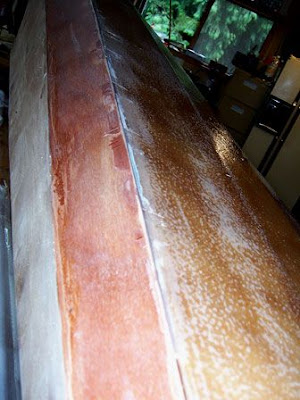
Then I started saturating the cloth with a top coat of epoxy. I applied this saturation coat with a roller and then brushed it smooth from keel line down to the edge (which I believe they call the "sheer"). I found the brush did a better job helping avoid air bubbles and keeping the coat thin. I did not squeegy (I guess we'll see how that turns out).
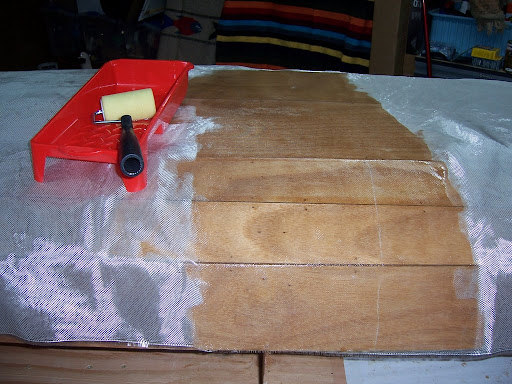
Once the cloth covering the entire hull was saturated I worked out the rest of the air bubbles and let it dry over night. The next day I brushed one more coat of epoxy over the entire hull. I was very pleased with the results.
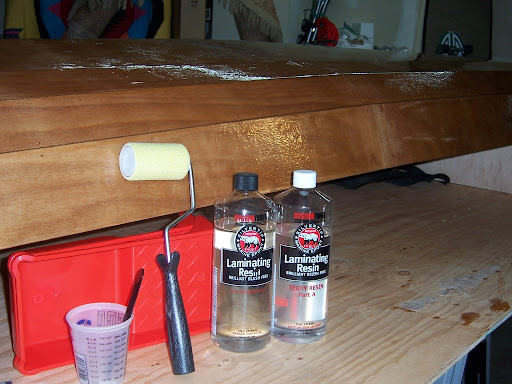
I didn't want to take any chances with the epoxy this time, so I drove down to Fisheries Supply in Seattle and bought the best epoxy they had. System 3 has a new line called "Silver Tip" and (while quite expensive) it was well worth not having to worry about whether it would cure.
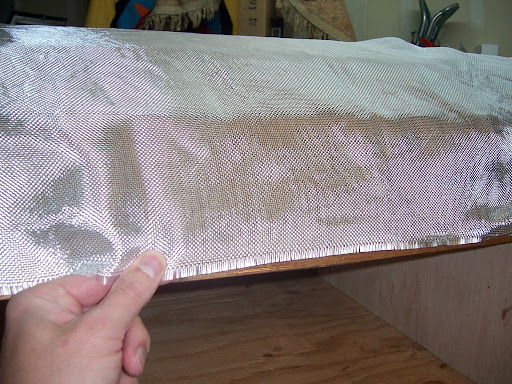
I debated whether to just fiberglass the middle section, or do the entire hull - I opted for the entire bottom hull figuring it wouldn't hurt to have double fiberglass on the bow and stern. I started by using my 1/8" foam roller and laying down a thin coat of glue.
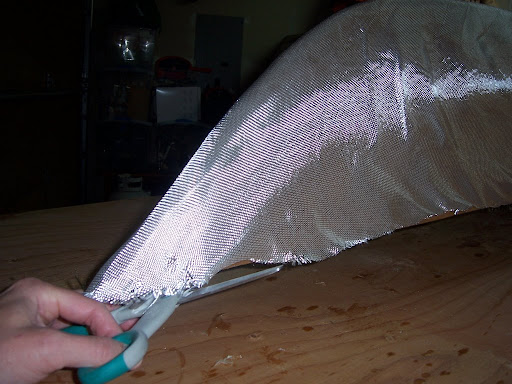
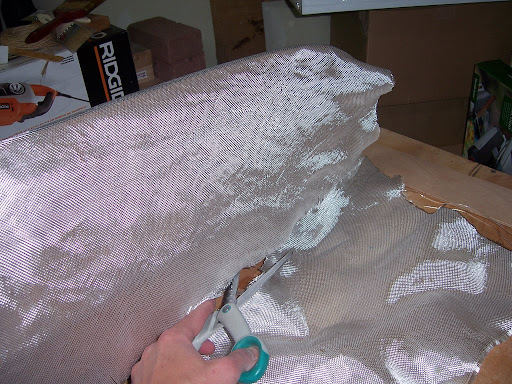
Then I covered the hull with fiberglass cloth (from bow tip to stern), pulled down on the middle section (I knew it would lay down and stretch slightly once it was wet) and trimmed the extra cloth at the ends.
Then I started saturating the cloth with a top coat of epoxy. I applied this saturation coat with a roller and then brushed it smooth from keel line down to the edge (which I believe they call the "sheer"). I found the brush did a better job helping avoid air bubbles and keeping the coat thin. I did not squeegy (I guess we'll see how that turns out).
Once the cloth covering the entire hull was saturated I worked out the rest of the air bubbles and let it dry over night. The next day I brushed one more coat of epoxy over the entire hull. I was very pleased with the results.
Subscribe to:
Posts (Atom)